
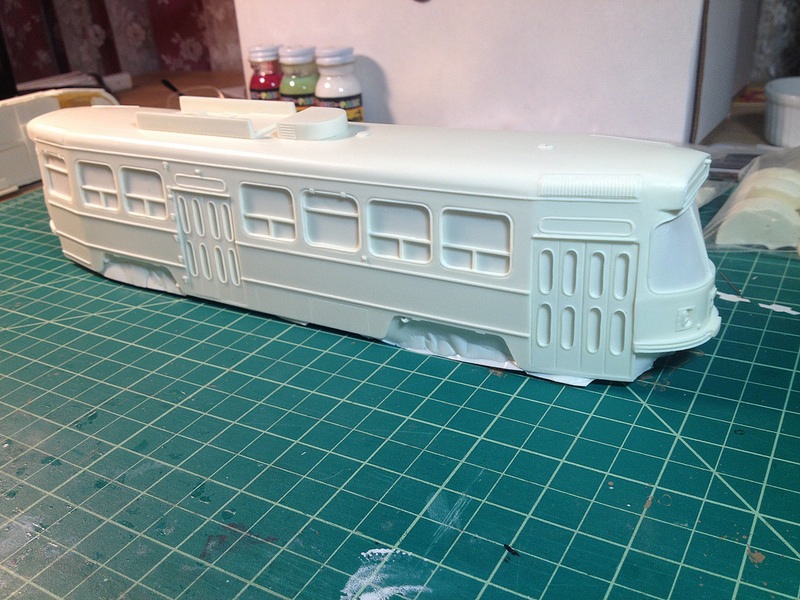
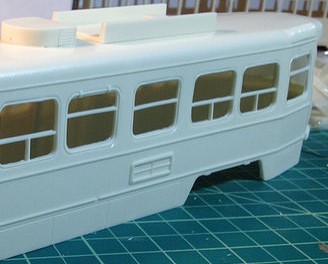
Finished model
This page can serve as an informal guide for assembling and finishing this "craftsman" kit. I have completed two of these kits, and I think with time and patience, the finished car could rival the St. Petersburg Tram Collection offering.
Please keep in mind, that these are just suggestions on how to proceed, based on my experience.
Images can be enlarged by clicking on them.
The O Scale TTC CLRV resin kit is produced by Berkshire Car Shop and can be ordered by contacting Ed Skuchas at berkshirecarshop@comcast.net. They can also be purchased at model traction meets at various locations during the year - for more information on meets check eastpenn.org and nycmodeltransit.org.
Finished model
This kit includes a body, chassis (floor), seats, various interior & exterior detail parts, truck side frames and a complete set of decals. In order to complete the car, you need to order trucks and a trolley pole. LRV trucks, without side frames, are available from Q-Car Company, model no. MT010LRVUNI - power/trailer set. The side frames included with the kit are made to be glued to the inside frames of these trucks.

Watch 2 TTC CLRV O scale models in action.
Refer to prototype CLRV photos for inspiration!
PHASE 1
Trimming, drilling, and cleaning!
For this you will need an Exacto knife with fresh blades, a set of small files, emory boards, and a variety of sandpaper. You will also need a pin vise and drills to drill out various holes for trolley pole, pole hook, and details you may add to the body.

This is where a lot of patience and time is required. Do not rush any part of the cleanup of the body! These kits are cast by hand, so the body side walls may vary in thickness. You can make some of the thicker areas thinner by sanding the interior walls, before making any cuts. I have found that the door side of the car is thicker than the driver side, especially near the rear exit door. I used 100 grit 3M sandpaper cut in a 2 inch strip, wrapped around a small block of wood to do this.
I placed the chassis/floor in the body and secured it with 2 rubberbands. This will allow you to apply pressure while carefully cutting out each window opening with an Exacto knife, with a fresh blade. Cut as close to the window frame as possible - starting out with light pressure, making several passes for each cut. You may be tempted to use a Dremel to cut out the material, as it may still be thick in spots, but I find it's very hard to control and may get away from you, destroying detail work on the body! I know, I did a little damage, it wasn't worth it!


Once the windows are trimmed out, the other pieces - chassis (floor),seats, stepwells, front pilot, and truck sideframes - can be trimmed of any flash. Also, test fit the stepwells into the floor and make any adjustments for a good fit.


Arrange the seats as they would be placed in the car. You will need 11 double seats for the door side and 4 double seats on the operator side. You need to cut off the standee pole base on one side or the other. Also cut off one on a single seat, this is the one that goes on the door side and faces the aisle.
There was an omission in the patterns and one mullion was omitted from the window across from the rear exit door, above the side vent. You can make the vertical missing piece from styrene stock or from the scrap material left from cutting out the windows.

Also, fill in any missing trim and imperfections in the body casting with body filler (Squadron putty). Check the anticlimbers, they may need some work with a file to enhance and straighten the lines. Fill in any missing detail with putty and sand smooth, to blend in.
I decided to make a roof ladder out of 1/32" brass rod. I made a jig with a piece of wood to place the brass rod pieces for soldering. Holes are drilled into the car body above the rear exit door, as shown. The holes are 7/16" apart (across) and 9/32" apart (vertically). The rungs are 7/32" apart.


Also, drill out the hole for the trolley pole screw (2-56)and a hole in the roof at the spot for the pole hook, to put a 00-90 screw to hold the hook in place. I drilled out the underside of the pole hook casting to accept the 00-90 screw.
I made a set of windshield wipers from the same 1/32" brass rod on a jig for soldering. The 2 wipers are not exactly the same, as on the prototype. They are mounted on slightly different angles. Appropriate holes are drilled into the front of the carbody to accept wipers.


Also, I cut off the marker light detail and drilled the area to accept small green (front) or red (rear) jewels. It is possible to drill holes for LEDs, if you want to light them up. For this, some work on the inside will need to be done to ream out the area behind the destination sign and marker lights. A Dremel tool with a reaming bit (at slow speed) is good for this.
VERY IMPORTANT! Once you are finished with the bodywork, drilling holes, etc ... EVERY part of the car (inside and out) that is to be painted must be lightly sanded with fine finishing sanding film, to "rough" it up a bit. This includes any area around or between details, body trim, anticlimbers, seats, floor, etc. The resin used is very slick. The primer will not adhere properly if this not done. Once that is done, you can wash all parts with mild soap and water (don't use hot water - parts may warp). Allow to dry thoroughly before proceeding.
The photos below show the kit's sideframes and Q-Car Company trucks. The first car I did was intended as a static display, so I only needed trailer trucks. See the next section, below, if it will be powered.


Modifying the chassis/floor for a Q-Car power truck. Drill out the hole in the rear body bolster. You can use a Dremel with a 194 reamer bit (on slowest setting) to remove the raised, center part of the bolster and center sill for a flat surface. Then use the power truck to measure the area to be cleared for the truck bolster and motor/gearbox.


Draw out the area to be cleared. Then continue, with the Dremel on slow, reaming out the area. The deepest part is a circle of 11/16" for the bolster, the "butterfly" shaped area (Front to back, the area for the motor is 1-3/8") is just deep enough to clear the motor with some allowance for up and down action. The floor is thick enough, that a full cut out for the bolster isn't necessary, but you can cut the circle out completely and use the Q-Car body bolster provided with the truck.
On to PHASE 2! or to CLRV photos
 Back to Toronto Transit Models HOME PAGE
Page edited: 08-26-2019